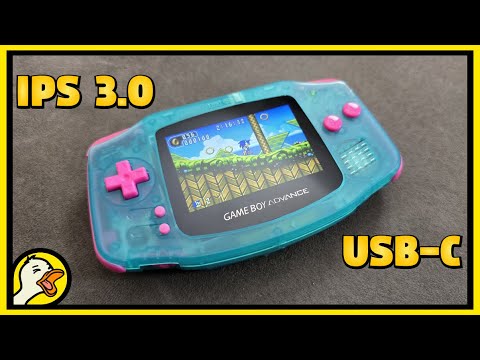
In this video we install and review the Funnyplaying laminated IPS 3.0 kit and GBA USB-C battery mod. This mod is user friendly for any Gameboy fan because soldering is not required to get up and running–and with the new battery you can stop throwing away money on AA’s! I hope this tutorial helps you out!
All the accessories and replacement parts mentioned in this video can be purchased from the awesome retro game store – www.eebuys.com
Mod Components
‣ IPS 3.0 Kit:
‣ Battery Kit:
‣ Shell:
‣ Buttons:
‣ Pads:
#fantasticquack #quackfix #retrorepair #videogames
source
gameboy ips
nintendo,handheld,retro,video games,gba
#Upgrading #Gameboy #Advance #IPS #Screen #USB #Battery #Mod


Omg what a beauty
Hot dog, what a pleasant surprise – seeing this on my YT front page. Looks great, man! Your editing skills are always getting better and more professional. I'm excited to play some Golden Sun on this bad boi.
Great video! I’ve never tried this myself but I think you can remove stickers with alcohol, then when it evaporates you can stick it again, I saw it in a lockpicking lawyer video once. He was applying it with a syringe 💉
Excellent video, thank you for this.
I found this video suggestion on my feed and found it very entertaining and kinda nostalgic, i happen to still have 3 gba sp, and since 2 are special editions i was thinking about making also the 3rd one into one.
If you don't mind, can i ask why do you have shaky hands? It happens to me aswell when i have to do precision tasks
first time watchin ur videos and i love it u earned a sub
Good mod 👍
The Best Channel in the World ❤🔥❤❣♥
What kind of tape is that again? I'm new to modding
I think we should normalise keeping the original case. I think they look pretty good on the GBA.
Great video! Is it safe to use isopropyl alcohol without gloves? Im completely noob.
Wow the fact that is completely solderless is amazing, I don’t own a soldering iron so something like this is perfect 🤩
Amazing content, subbed!
Genuine question: why not just buy rechargeable batteries like Enloops rather than going through the trouble of modding?
Hey would you happen to know if the battery fits in to a V5 HiSpeedido shell if I just buy the FunnyPlaying battery door? I think the battery is too large for my current mod. Thank you!
Wait did you say to let the membrane dry next to a full jug of apple juice?! LOL WTF Why?
Can you play it while charging?
i love these types of videos, but theyre almost always shorts. long form is where its at lets gooo
Where did u buy the pink start/select buttons? It’s not included in the link for GBA buttons you included.
I have shakey hands, too, applying stickers to gameboy cartridges gets pretty intense for me 😂. Nice guide also I just ordered this kit so definitely going to use this as a reference
I bought rechargable aa batterys 5 buks for 4 2100mah 5 buks for charger. Cheaper and twice the mah, 1.2v instead of 3.7v with the aa tho. But no problems untill now. owh and i destroyed a perfect gba motherboard with this mod replaced caps and fuse but its dead. Had to buy a replacement. So remember this takes more juice and can destroy your board
Regarding the shaky hands, I am no expert on this, but you can try to take Zinc with Vitamin C, it should improve it
I watched countless videos and finally came across yours. This was the perfect video!!!! Thank you soooo much
5:30 kind of wondering about this now. I didnt bend my ribbon for the touch sensor. The video tutorial I followed by the mod supplier, 'Handheld Legend' did not fold it. I was wondering if there was any difference anyway, because I noticed the piece of tape? on the back of the ribbon. Everything stills works fine anyway
We ordered the same case, good taste new sub 👍
Does the IPS screen kit work for the original case?
Magnífico tutorial! Te quedó una GBA muy bonita y funcional, además de mostrar todo el proceso paso a paso. Me encantan este tipo de videos de modificaciones de la GBA, saludos desde España!
Does it work for GBA model agb 001?
How many time the battery supports?
Is the song after your intro from Sonic Unleashed?
How does the battery connect to powering the system?
My screen ribbon will not seat in the cable ribbon that comes from the mobo. The little brown hinge won't shut. Any suggestions?
Awesome upgrade! My OCD went into defcon 1 staring at that tiny piece of plastic film the whole time, but I'm glad it was removed. I can rest easy now 😅
You didn't update the sound
Crazy! But what about the shell? I hear that these replacement shells often don't fit perfectly in one way or the other, or feel like they're made of lower quality materials. What is this one like?
is soldering the 3 wire required?? i got mune but its black screen, i dont know if i need to solder that 3 wires or not.